Frozen
Here is an active version
Hardware PWM
Last time we got a garland of four LEDs to turn on and off wonderfully. Let’s try to use the hardware PWM that Raspberry Pi has. Of course, there is nothing to prevent the implementation of PWM in software, but I prefer to use the hardware in the first place - it was also paid for![]()
The circuit is very simple: I chose a green 5mm LED with a voltage drop of at a current of 8mA and a limiting resistor :
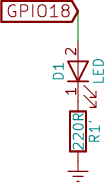
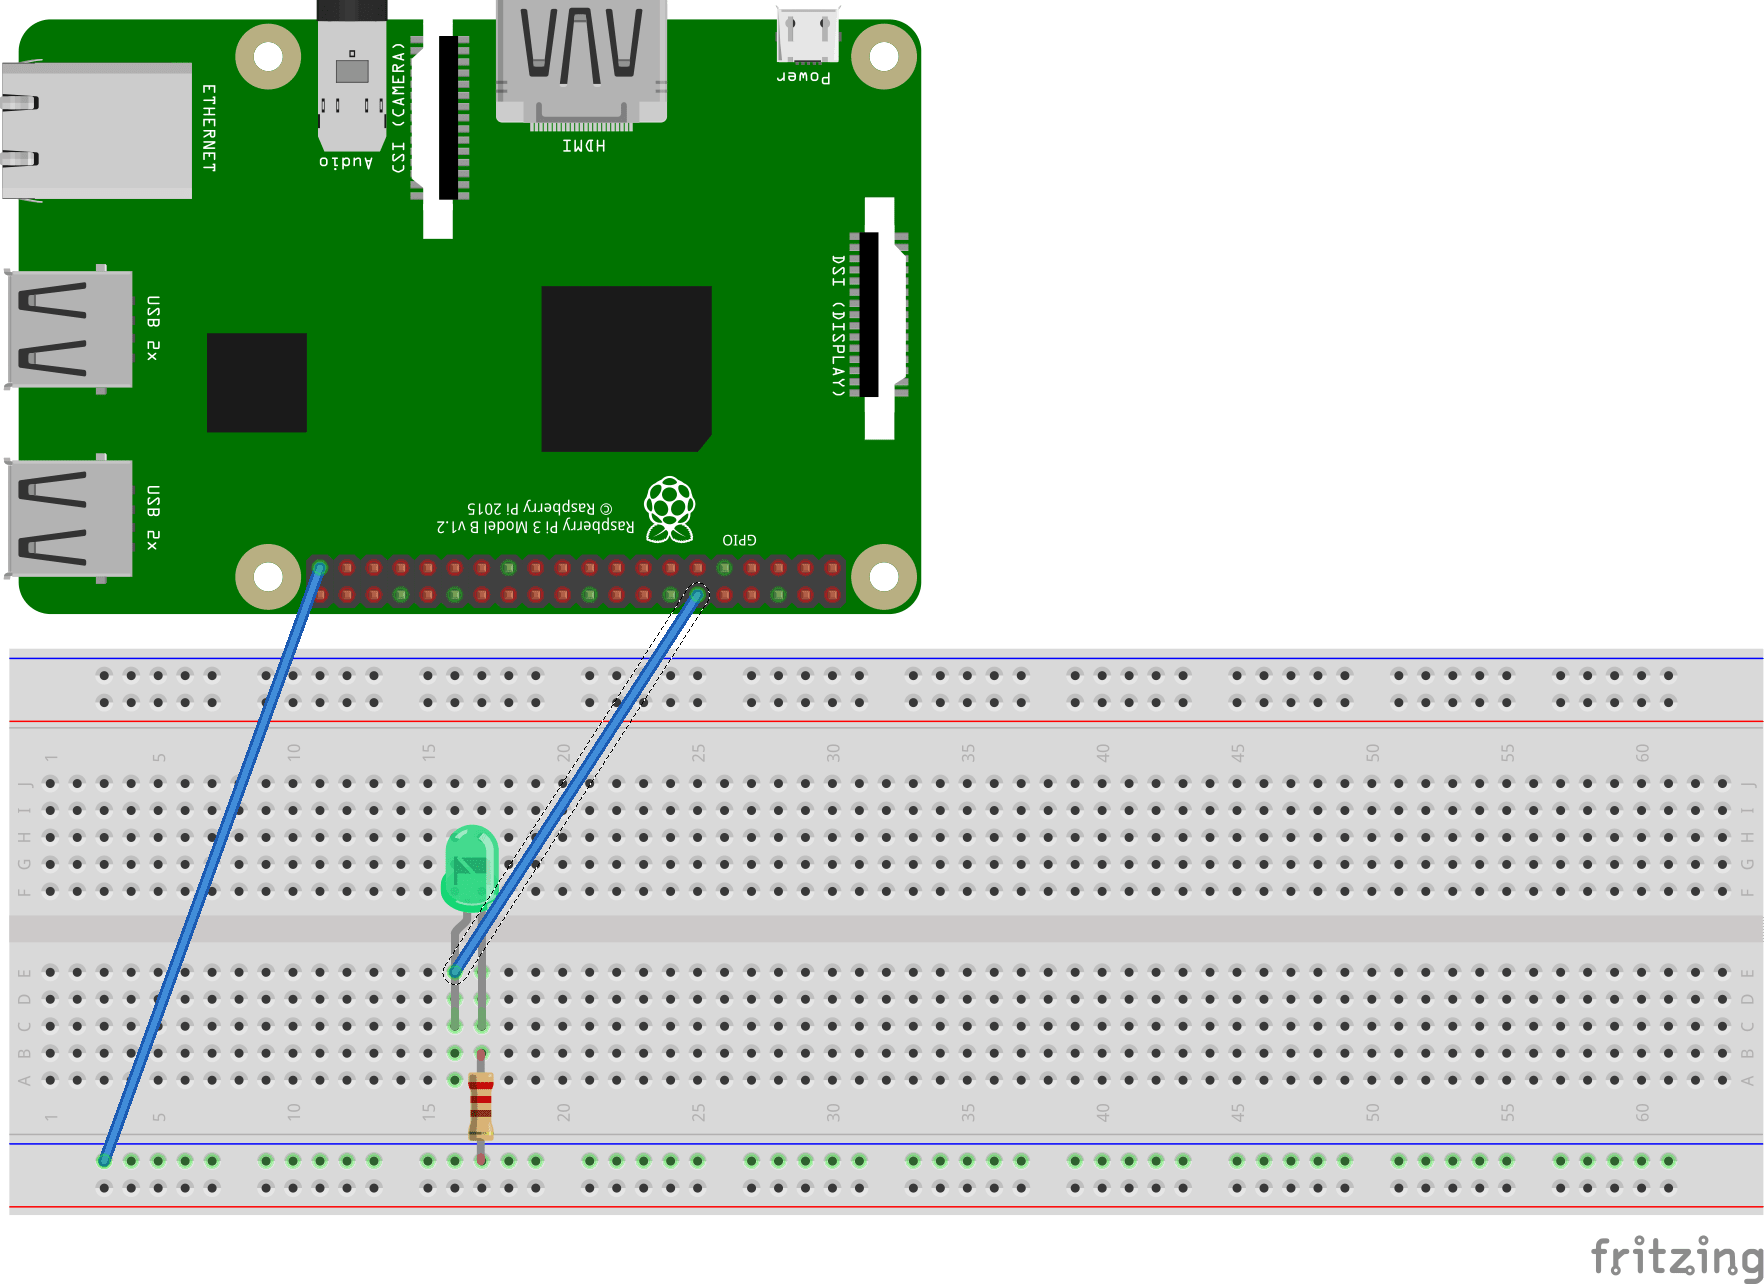
For PWM use GPIO18.
Breadboard
Code
package io.github.yrabbit.kotlin

import io.github.yrabbit.java.util.AddDir
import jpigpio.JPigpio.*
import jpigpio.Pigpio
import jpigpio.Utils

fun main(args: Array<String>) {
    AddDir.addDir("/home/rabbit/local/lib")
    println("*** Raspberry Pi Kotlin ***")
    val pigpio = Pigpio()
    pigpio.gpioInitialize()
    Utils.addShutdown(pigpio)
    normOutputDriveStrength(pigpio)

    println("PWM0 freq:$PWM_FREQ, max duty:$PI_HW_PWM_RANGE")
    // test pwm0: change duty from 0 to MAX
    repeat (3) {
	    for (vol in 0..PI_HW_PWM_RANGE step PWM_STEP) {
		pigpio.gpioHardwarePWM(PWM0_GPIO, PWM_FREQ, vol)
		pigpio.gpioDelay(100 * 1000)
	    }
	    for (vol in PI_HW_PWM_RANGE downTo 0 step PWM_STEP) {
		pigpio.gpioHardwarePWM(PWM0_GPIO, PWM_FREQ, vol)
		pigpio.gpioDelay(100 * 1000)
	    }
    }
    pigpio.gpioSetMode(PWM0_GPIO, PI_INPUT)
}


fun normOutputDriveStrength(pigpio: JPigpio) {
    // Check drive strength on GPIO
    val strength = pigpio.gpioGetPad(0)

    if (strength != CURRENT) {
        pigpio.gpioSetPad(0, CURRENT)
    }
}

const val PWM0_GPIO = 18

const val PWM_FREQ = 20000

const val PWM_STEP = PI_HW_PWM_RANGE / 30 // 30 seconds for full

const val CURRENT = 8 // mA
Breath
Well, isn’t it amazing?![]()
Second hardware PWM
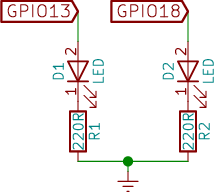
Add one more LED (red 5mm voltage drop , a limiting resistor at a current of 8mA) and connect it to the second PWM on GPIO13:
Breadboard
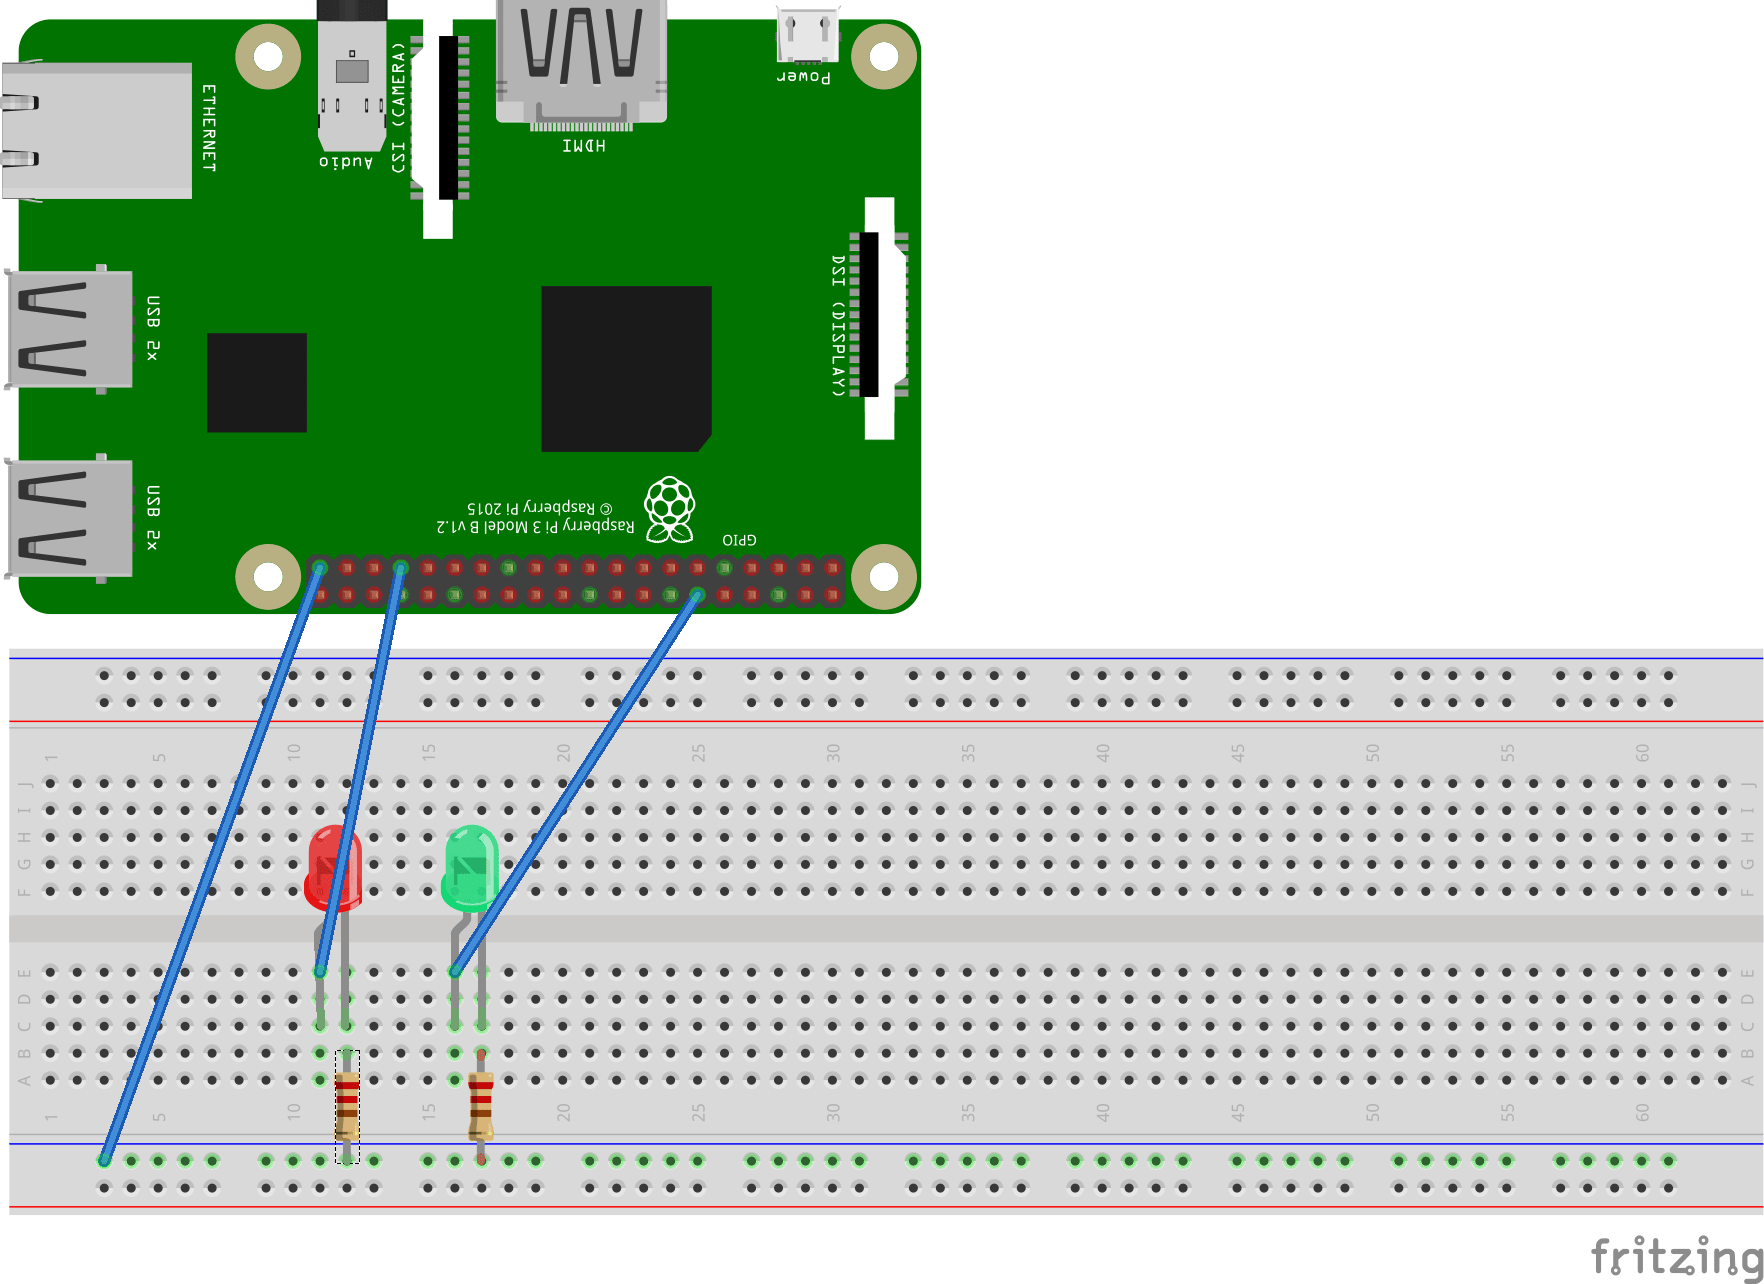
When there are more details, I try to check the installation on a small power supply in order not to lose Rasperry Pi due to errors:
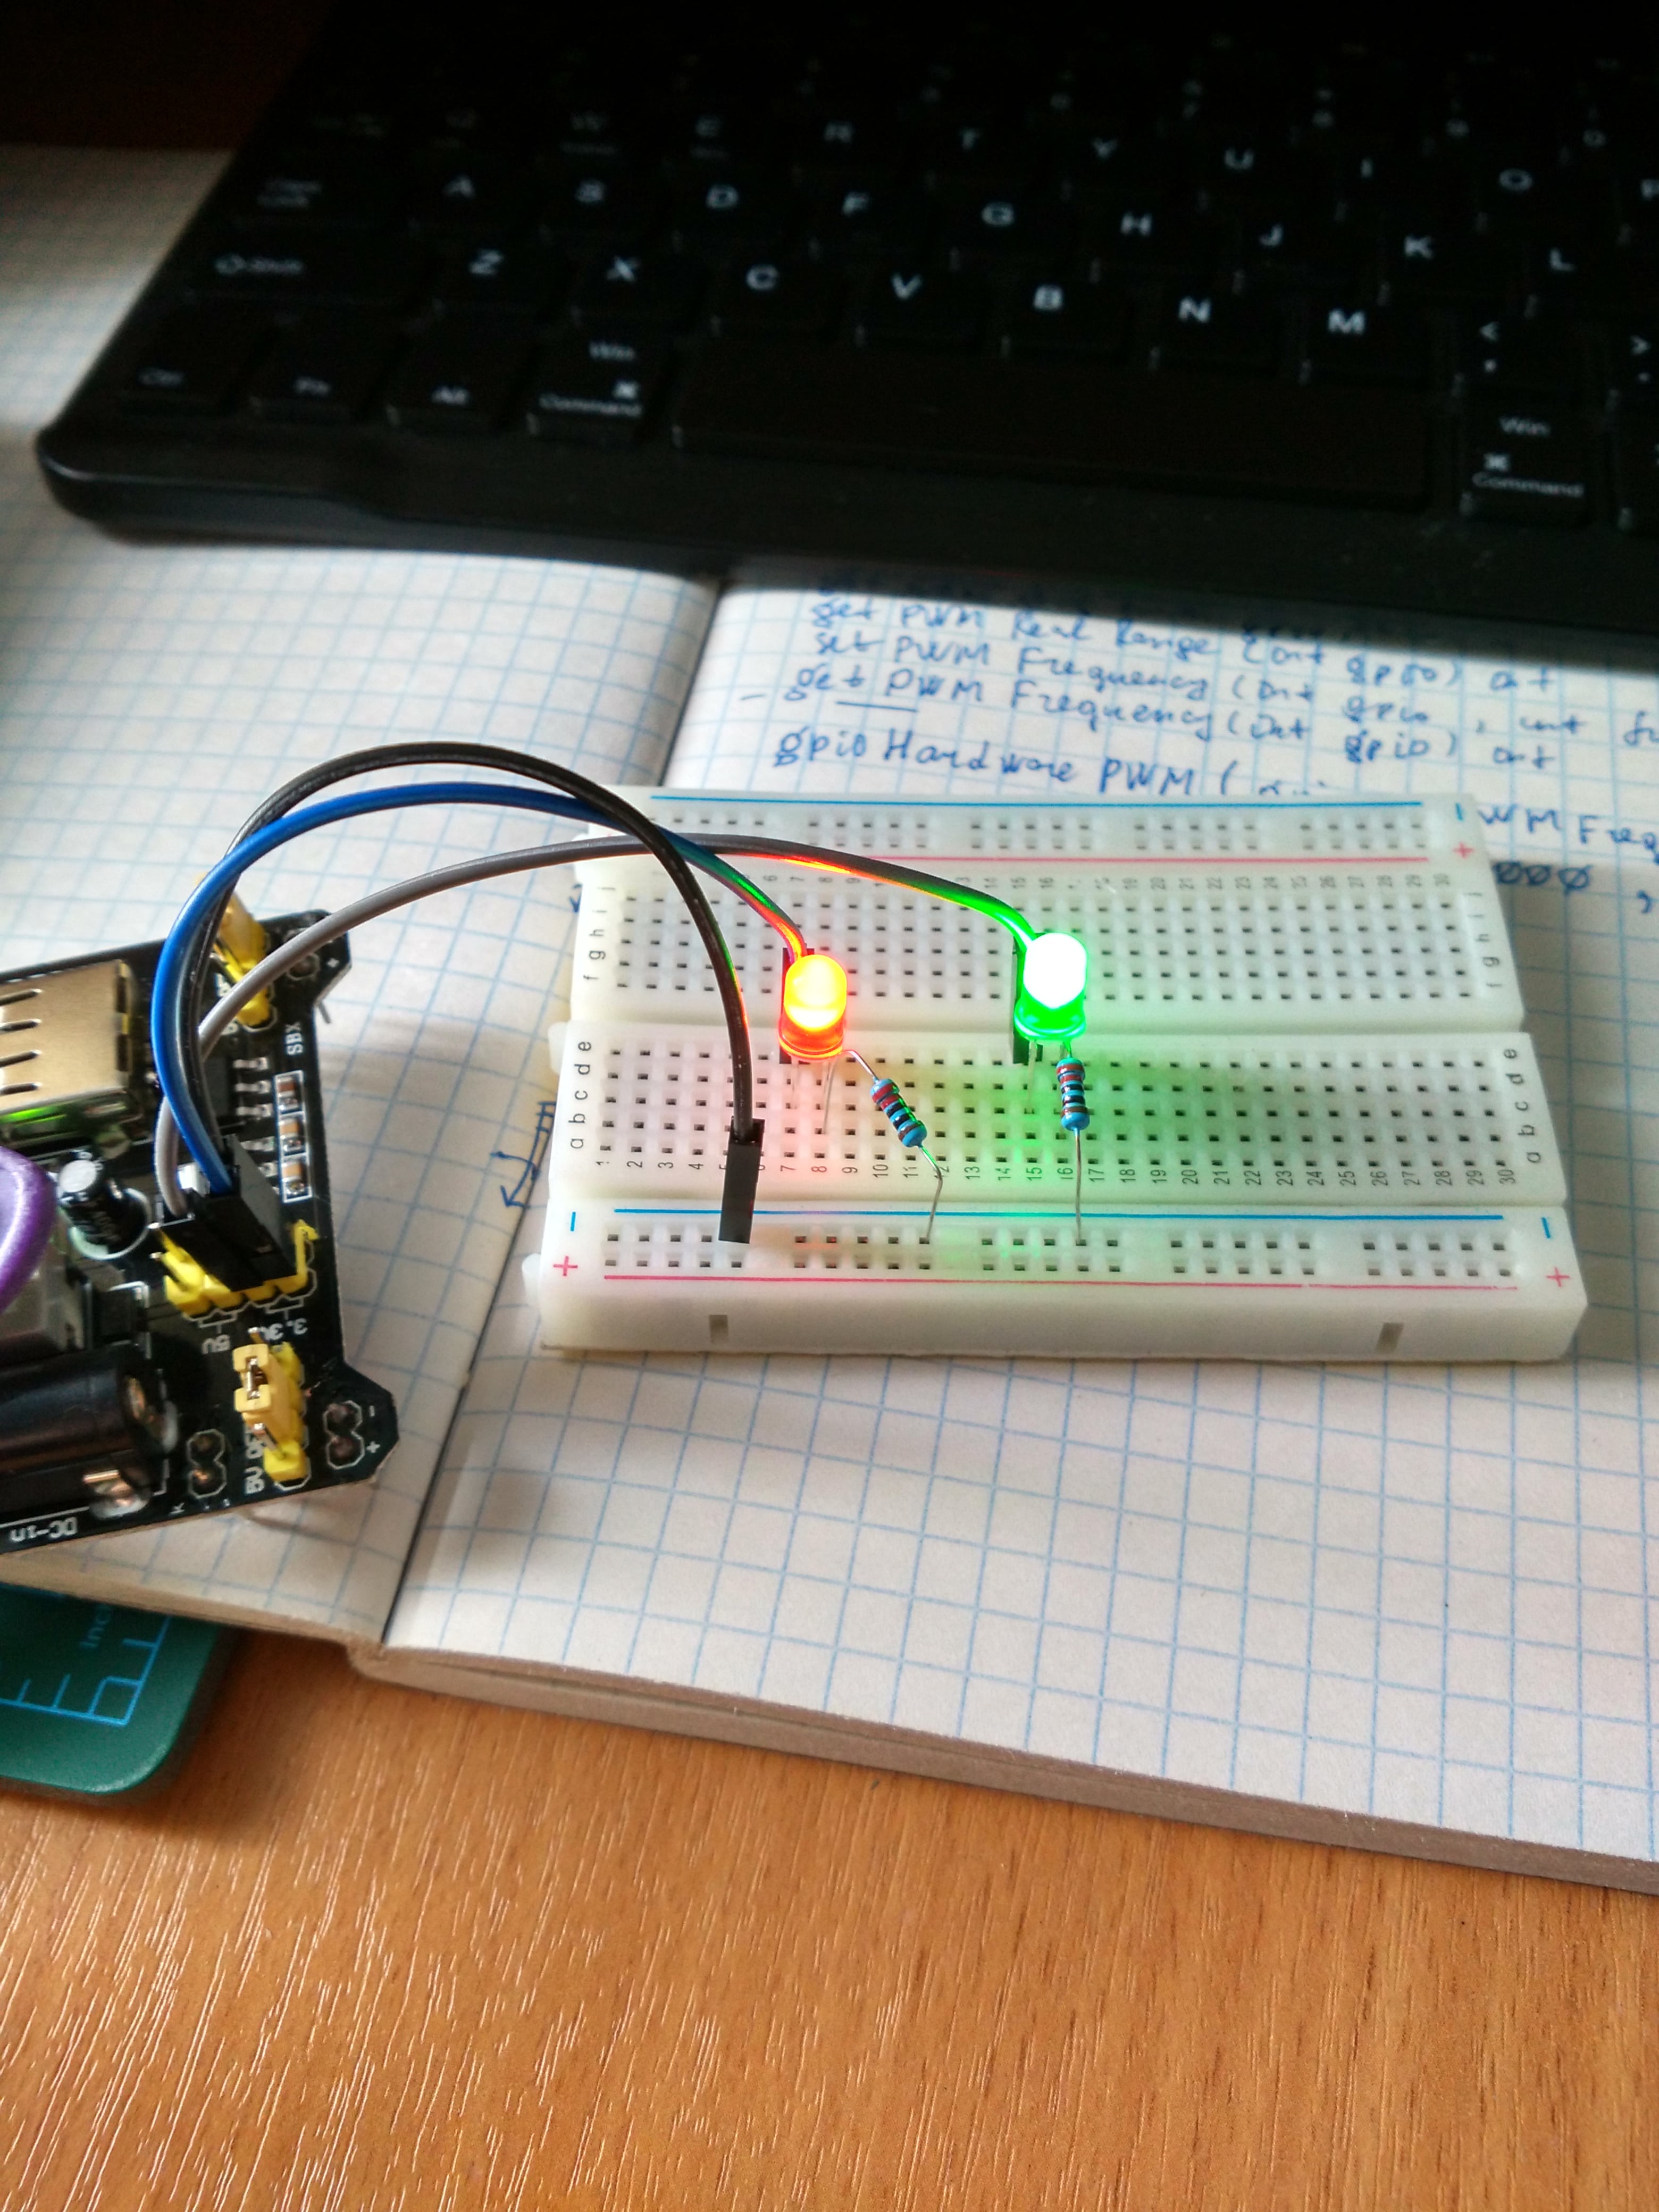
Code
To manage two PWMs, it’s time to take advantage of Kotlin’s interesting features like coroutines. Each of the coroutines will reprogram its PWM and fall asleep for a while giving the opportunity to work another coroutine.
package io.github.yrabbit.kotlin

import io.github.yrabbit.java.util.AddDir
import jpigpio.JPigpio
import jpigpio.JPigpio.PI_HW_PWM_RANGE
import jpigpio.JPigpio.PI_INPUT
import jpigpio.Pigpio
import jpigpio.PigpioSocket
import jpigpio.Utils
import kotlinx.coroutines.experimental.async
import kotlinx.coroutines.experimental.delay
import kotlinx.coroutines.experimental.launch
import kotlinx.coroutines.experimental.runBlocking
import kotlin.system.exitProcess

fun main(args: Array<String>) {
    AddDir.addDir("/home/rabbit/local/lib")
    println("*** Raspberry Pi Kotlin ***")
    val pigpio = Pigpio()
    pigpio.gpioInitialize()
    Utils.addShutdown(pigpio)
    normOutputDriveStrength(pigpio)

    println("PWM0 freq:$PWM_FREQ, max duty:$PI_HW_PWM_RANGE")
    runBlocking {
        val slowBreath = launch { runPWM(pigpio, UsedGPIO.Pwm0.pin, 30, 3, PWM_STEP_30) }
        val fastBreath = launch { runPWM(pigpio, UsedGPIO.Pwm1.pin, 10, 20, PWM_STEP_10) }
        slowBreath.join()
        fastBreath.join()
    }
    gpioSwitchToInput(pigpio)
    println("done.")
    exitProcess(0)
}

suspend fun runPWM(pigpio: JPigpio, pwmPin: Int, msDelay: Int, cnt: Int, st: Int) {
    repeat (cnt) {
        println("cnt:$cnt, ${Thread.currentThread().name}")
        for (vol in 0..PI_HW_PWM_RANGE step st) {
            pigpio.gpioHardwarePWM(pwmPin, PWM_FREQ, vol)
            delay(msDelay)
        }
        for (vol in PI_HW_PWM_RANGE downTo 0 step st) {
            pigpio.gpioHardwarePWM(pwmPin, PWM_FREQ, vol)
            delay(msDelay)
        }
    }
}

fun normOutputDriveStrength(pigpio: JPigpio) {
    // Check drive strength on GPIO
    val strength = pigpio.gpioGetPad(0)

    if (strength != CURRENT) {
        pigpio.gpioSetPad(0, CURRENT)
    }
}

/*
 * Clean up
 */
fun gpioSwitchToInput(pigpio: JPigpio) {
    UsedGPIO.values().forEach {
        pigpio.gpioSetMode(it.pin, PI_INPUT)
    }
}

enum class UsedGPIO(val pin: Int) {
    Pwm0(18),   // GPIO18
    Pwm1(13)    // GPIO13
}
val LEDS = arrayOf(UsedGPIO.Pwm0, UsedGPIO.Pwm1)

const val PWM_FREQ = 20000

const val PWM_STEP_30 = PI_HW_PWM_RANGE / 30
const val PWM_STEP_10 = PI_HW_PWM_RANGE / 10

const val CURRENT = 8 // mA<Paste>
Unfortunately it turned out that the pigpio library does not work very well in a multithreaded environment: I always received signal 11 at trial runs. So I had to temporarily use the option pigpio as a daemon.
Correction: as it turned out there is a way to make pigpio work without a daemon: you need to run coroutines in CoroutineScope. Then they work in the same thread as the library:
fun main(args: Array<String>) {
    AddDir.addDir("/home/rabbit/local/lib")
    println("*** Raspberry Pi Kotlin ***")
    val pigpio = Pigpio()
    pigpio.gpioInitialize()
    Utils.addShutdown(pigpio)
    normOutputDriveStrength(pigpio)

    println("PWM0 freq:$PWM_FREQ, max duty:$PI_HW_PWM_RANGE")
    runBlocking {
        val slowBreath = launch { runPWM(pigpio, UsedGPIO.Pwm0, 30, 3, PWM_STEP_30) }
        val fastBreath = launch { runPWM(pigpio, UsedGPIO.Pwm1, 10, 20, PWM_STEP_10) }
        slowBreath.join()
        fastBreath.join()
    }
    gpioSwitchToInput(pigpio)
    println("done.")
    exitProcess(0)
}
Running
It’s a miracle!![]()

