Frozen
Here is an active version
Recalling the drive strength of the GPIO
Last time, when the LED so delightfully shone, we completely lost sight of the need to somehow regulate the current on the GPIO, since 8mA, which set by default, a bit different from the desired 4mA.
To begin with, the current is regulated1 not for a single GPIO, but for all at once (in fact, for three groups of contacts, but on Raspberry Pi 3b, which I have, such a group is only one - with the number 0).
When I tackled the current-regulation problem, I found that these functions are missing in the jpigpio library, so I had to add them. I made a PR, but until it is accepted into the main repository, you can use my.
Example
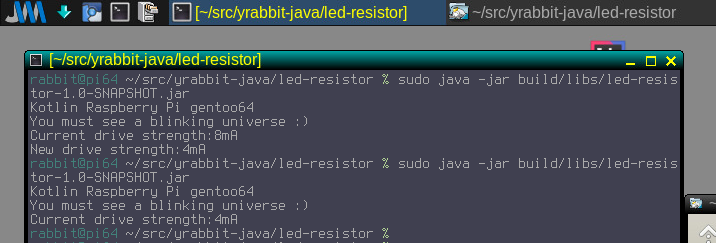
Read the current drive strength settings and change, if necessary:
fun main(args: Array<String>) {
    // dirty hack: need to point java.library.path to the location of libJPigpioC.so
    AddDir.addDir("/home/rabbit/local/lib")

    println("Kotlin Raspberry Pi gentoo64")
    println("You must see a blinking universe :)")
    try {
        // Init lib
        val pigpio = Pigpio()
        pigpio.gpioInitialize()
        Utils.addShutdown(pigpio)

        // Mode output
        pigpio.gpioSetMode(LED_PIN, PI_OUTPUT)

        // Check drive strength on GPIO
        val strength = pigpio.gpioGetPad(0)
        println("Current drive strength:${strength}mA")

        if (strength != CURRENT) {
            pigpio.gpioSetPad(0, CURRENT)
            val newStrength = pigpio.gpioGetPad(0)
            println("New drive strength:${newStrength}mA")
        }

        repeat(3) {
            // ON
            pigpio.gpioWrite(LED_PIN, PI_HIGH)
            pigpio.gpioDelay(500 * 1000)
            // OFF
            pigpio.gpioWrite(LED_PIN, PI_LOW)
            pigpio.gpioDelay(500 * 1000)
        }
    } catch(e: PigpioException) {
        e.printStackTrace()
    }
    pigpio.gpioSetMode(LED_PIN, PI_INPUT)
}

const val LED_PIN = 26 // GPIO26
const val CURRENT = 4 // 4mA
How it worked:

-
Once again, I repeat that setting the GPIO current to 4mA does not mean that the current will be limited by this value. It just ensures that at a current of 4mA the logical levels will be clearly different. ↩

